Making an Underwater Camera Bag

We were going on holiday to Barbados and going to be snorkeling for the first time. How could I not try to get pictures of that? Two problems: the price of a professional underwater camera bag, and the quality of underwater point-and-shoots. So we compromised and designed a flexible underwater casing for my Olympus E1. This design can be customized to fit almost any SLR.

Once you have the materials, this underwater bag takes a few hours to assemble. I used this bag in the ocean at depths up to about 10 feet, and it never let any water in.
The upsides:

  • The camera stayed dry and safe.
  • I got to take high-resolution underwater pictures.
  • I didn’t have to pay the cost of another SLR to get the casing.
  • The casing is relatively compact.

The downsides:

  • It is hard to change the settings once the camera is in the bag, so I had to do some trial-and-error and guessing to set up the shot.
  • Autofocus was a bit spotty, but that might depend on the camera.
  • The design does not (yet) include a strap or ergonomic handle. It took a while to get used to holding it, and given its size restricts your movements somewhat.

In general, you want as bright of a day as possible, and you’ll probably still need to raise your ISO to at least 200 or maybe 400 to get blur-free shots. Autofocus worked alright, but it is very hard to look through the viewfinder. If you have a camera with autofocus in liveview, this should work much better. I usually ended up pointing the camera in the general direction of interesting stuff, taking a bunch of pictures, and going through them after to find the good ones. If you find your autofocus a little unreliable, it may work best to use a wide angle lens, keep your aperture fairly high (f8 or so), and keep your camera focused at infinity. Unless the fish are very close, that should work well.

Materials needed:

  • One shower drain
  • One large Aloksak plastic bag
  • 2 feet of aluminum rod
  • 2 small rubber washers
  • a small piece of anti-reflective glass or (preferably) plexi-glass
  • silicone caulking
  • closed cell foam or gasket material (to make sure your lens fits tightly into the drain)
  • Smaller aluminum, bamboo, plastic stick

Tools needed:

  • Hacksaw (for cutting through PVC)
  • File (for smoothing plastic edges and making ridges in the aluminum rods)
  • Pen (for outlining the lens port)
  • Coping saw (for cutting out the circular lens port from the plexi-glass)
  • Utility knife (for cutting foam spacers and the hole in the plastic bag)

I picked up all of this from my local Home Depot, except the Aloksak bag which you can get from an outdoor store (MEC for me).

First, make sure your Aloksak bag is big enough to fit your camera and lens. If it’s not, get a bigger one.
Next, make sure your shower drain has a large enough drain hole to fit over the front end of your lens. (I had to file the threads out of the center of the drain I bought to fit over my Olympus 14-54 lens) It’s ok if it is a little bit bigger, but it can’t be smaller. Everything fits? Excellent – we can now build the bag.


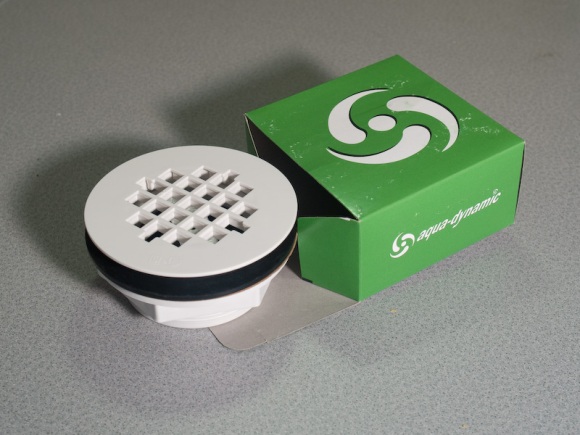
This is the drain as it comes from the store.


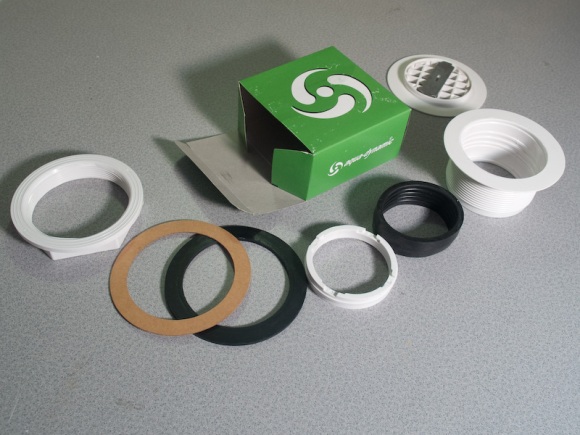
Here is the drain completely disassembled. The parts we are going to use are the two large plastic pieces that thread together, the black rubber washer and the cardboard washer. Save the rest for a rainy day or throw it out.


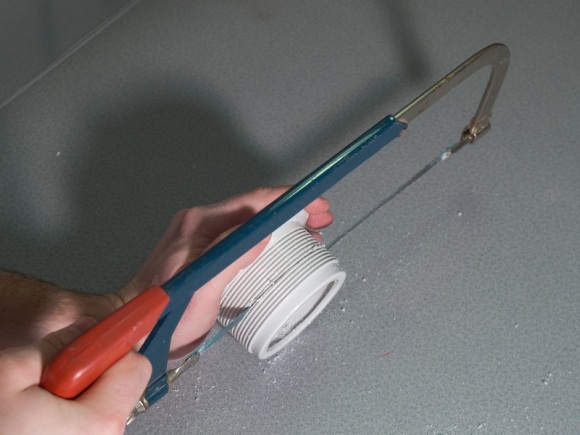
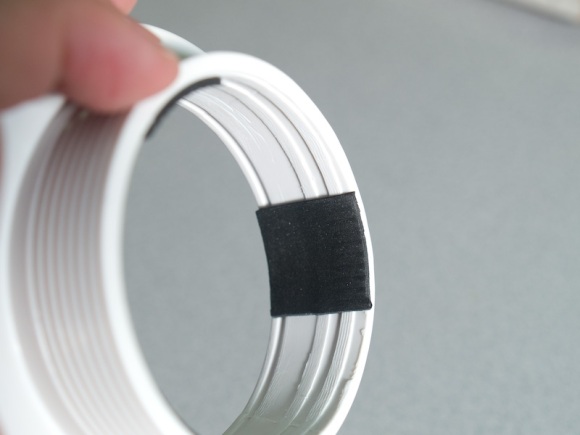
This particular drain had a small lip on the bottom that the lens couldn’t fit through, so I cut that off. Do whatever cutting or filing you need to so that the lens fits. Make sure to leave some of the threading.


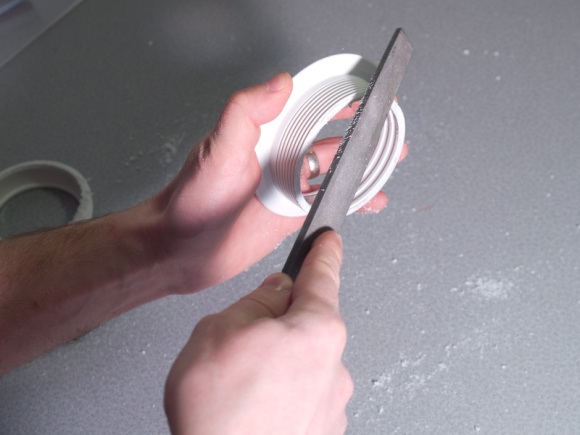
Sawing the plastic left some burrs, so I smoothed them out. File down any sharp edges. Assemble the pieces to make sure everything continues to fit together smoothly and securely.


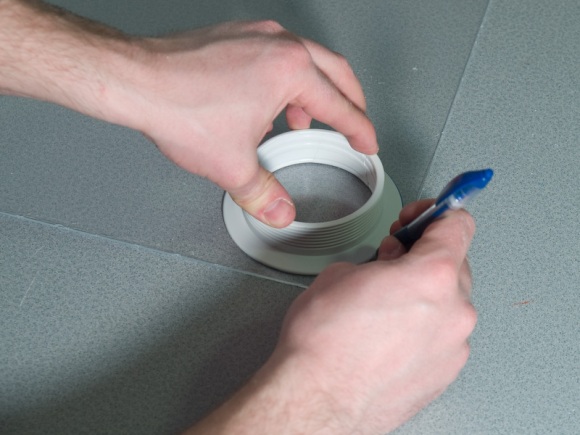
The lens port needs to cover the entire front of the drain, including the flange. Trace out the drain cover on the protective plastic film of the plexi-glass.


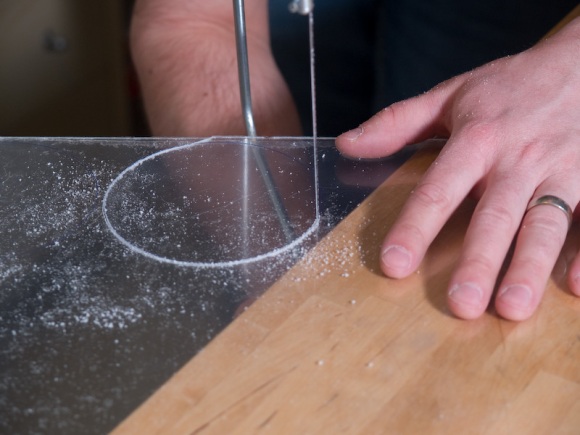
This was the trickiest point. At one point I put too much pressure on the saw and cracked the plexi-glass. Of course, I had a huge sheet so lots of room for error. Make sure you don’t put too much pressure on the saw while you’re cutting and cut out the circle (with the protective film still in place).


Back to the drain. I wanted to make sure the cover fit securely on the lens to keep the plastic parrallel to the front element, and the keep the camera from floating around inside the bag. Use closed cell foam or gasket material (depending on the thickness you need) to friction fit the lens inside the drain. You don’t want to put too much pressure on the lens, but you do need the shower drain to be secure. Experiment until you are happy with the fit.


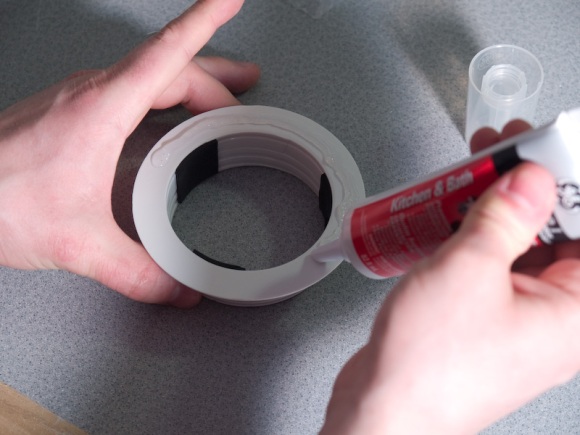
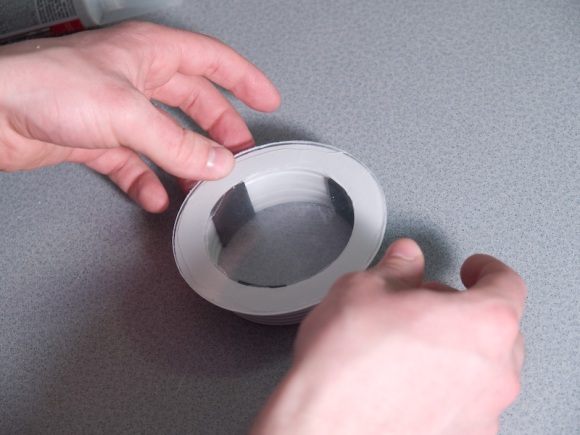
Now you need to secure the plexiglass to the drain with a watertight seal. Silcone the flange of the drain, making sure to get a continuous bead all the way around. Push the plexi-glass against the drain, lining up the edges. You should not have any gaps or air bubbles. You also don’t want so much silicone that it squeezes out everywhere, especially inside the drain as that can impact the optical quality. Outside can be cleaned up with the utility knife. The flange is probably big enough that you can get a good seal without excess silicone.


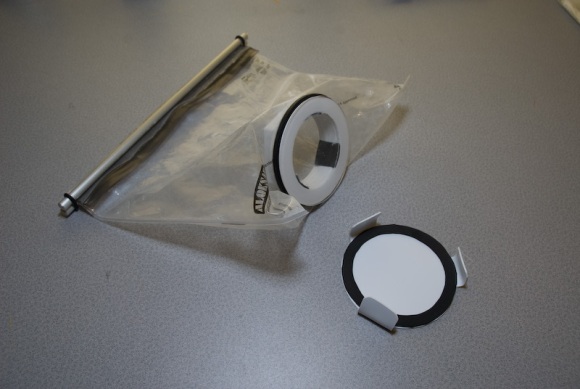
The lens port fully assembled. Wait for the silicone to dry before putting any stress on it.

Cut a hole in one side of the Aloksak bag, just large enough for the small end of the drain to fit through. I put the hole in centre of the bottom. That made the seal on the bag block the viewfinder. Learn from my mistakes.


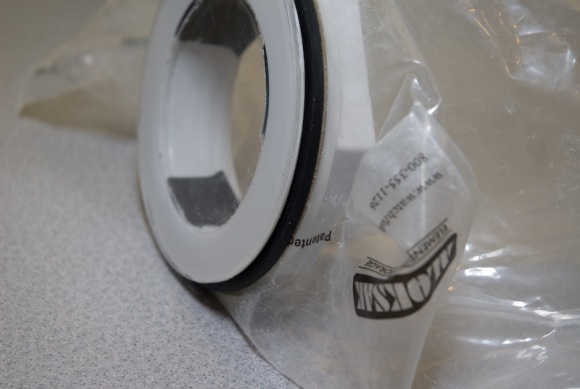
Put the drain (plexi-glass side down) on the table. Put the rubber gasket on, then slip the Aloksak bag over the drain threads so that the threads protrude into the bag (see picture). Reach inside the bag, put on the cardboard washer (or whatever second gasket you might have) and thread on the final part of the drain (this part the didn’t require any modifications). Make sure this is tight! The bag will be pinched between the two washers, and the whole thing secured by the threads of the drain.

Put your camera in the bag and seal the zipper, taking out most of the air. More air means it will be harder to keep the camera underwater. A little bit of air might slow its descent if you drop it (this did not get tested).

You now have a waterproof camera bag. While I was very confident in the water-tightness of the lens port and bag, the zipper on the bag is not particularly strong (Aloksak bags are Navy rated and supposed to be waterproof, but this is my camera we’re talking about.)


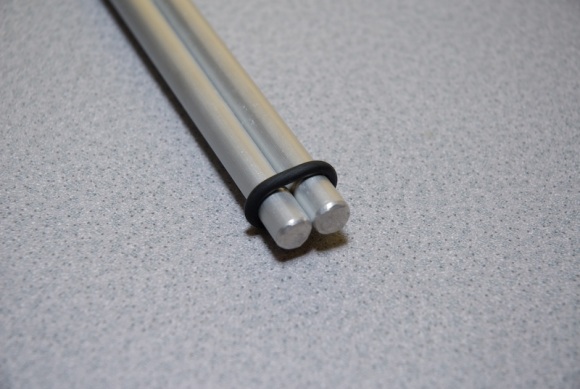
To make sure the seal on the bag wouldn’t open, particularly due the pressure of holding the bag, I cut two pieces of aluminum rods about 1″ longer than the length of the bag seal. I used the file to make a groove .5″ in from each end of the rods, so that a rubber washer could be cradled in it and hold the rods together extremely tightly.


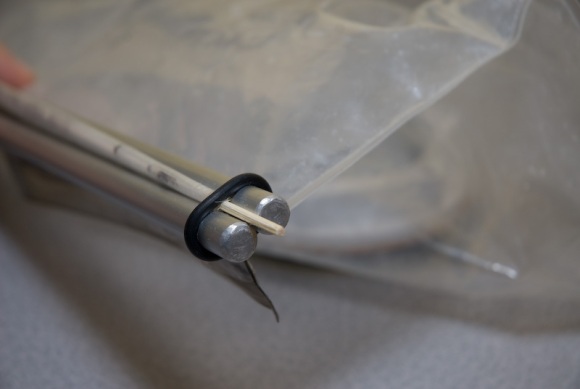
Once your camera is in the bag and the zipper is sealed, fold the end of the Aloksak on itself. Slide the folded edge between the two pieces of aluminum rod so that the fold is on one side and the zipper and camera are on the other. Slip the rubber washers over the ends of the aluminum rods, then slip the thin dowel through the fold.


Now you’re ready to go snorkelling with your SLR. Have fun!

Oh, and just to give you an early warning system if you do have a leak, put an alka-seltzer tablet in the bag with your camera. If water gets in the bag, the tablet will foam up, and you’ll know right away to surface and protect your equipment.

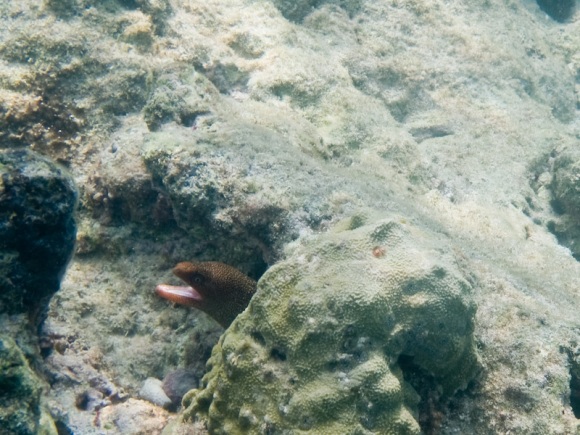
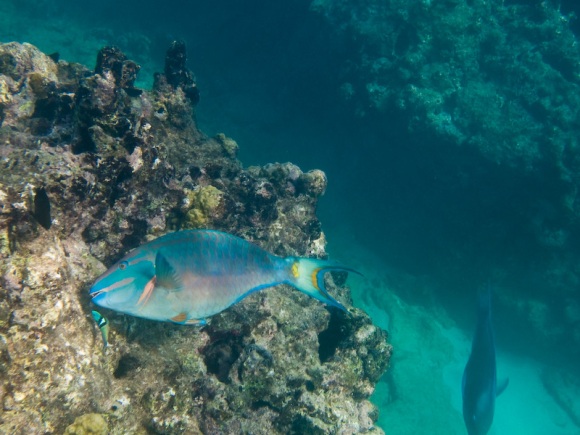
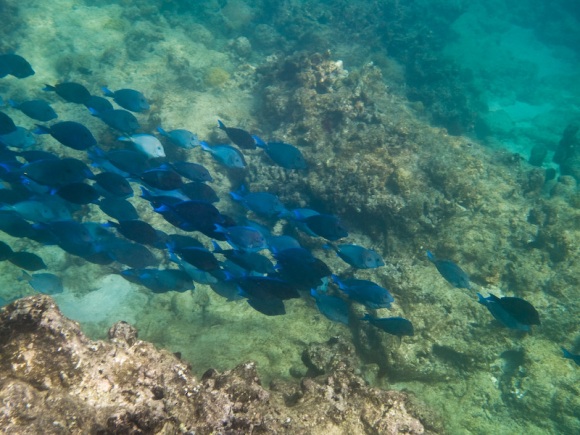
Here are a few photos I got with this setup:


To see where we went snorkeling and some more pictures, see http://travelsandtrails.com/place.php?place_id=98.

Note: This worked for me. I take no responsibility for any ruined SLR cameras out there. For the love of SLRs, test it in the bathtub first.
http://travelsandtrails.com

OK, so I haven’t been posting much for ages. That’s at least partly due to my work on Travels and Trails.com (it’s a good excuse anyway). It now has all the travel information and photos that my previous exploration section had, and is much better in many ways. There are still tons of things I’m planning to add, but you can already sign up and list your own places there, and browse everything – hopefully it’s much easier to find places.

So there you go. The exploration section is now gone for good. Check out Travels and Trails for the replacement.

Travels, Trails, and Tubes

For a long time the exploration part of this site has contained pictures and descriptions of a lot of the places I’ve been. It started out as zenphoto, and I started hacking it. I started by modifying themes, adding a bit in here and there. Eventually I added maps, because if you need one thing to describe a place, its a map. Unfortunately, a couple months ago, the service I was using to publish my maps shut down and my maps became unusable. While I was sadly deleting them (so the pages would actually load in a reasonable time) I got to thinking of all the shortcomings of my exploration section and all the things I’d like to do with it. Yeah, I love photography, but a gallery is only one of the important things to have on a site describing travels. You need maps, you need descriptions, in some cases you need more information such as elevation or distance or cost. The list goes on.

So I decided to build my own. And while I’m at it, I’m not just going to build it for me. I don’t get to go many places and I’d like to know about places I haven’t been to yet, so I’ll let other people add places too. Right now you need an email address to sign up. Considering the amount of spam I’m getting on this site, I need some sort of authentication system for users to add content, and I think an email address is best. If you think that’s a dumb system tell me about a better one in the comments – I might even change it.

With no further ado – Travels and Trails.com.

Keep in mind it’s still a work in progress. It will probably change drastically yet (If you think you know how it should change, let me know in the comments below). There are many parts of the site I’m still working on, and probably many bugs to fix yet. But hopefully it will work well for you. If you’re interested in travel or hiking, check it out. I have yet to add a lot of the places I have in the exploration section here. I’m splitting my time between programming and adding places, so it might take a while.

Raw vs Jpeg

When I first got my digital SLR, I set it to take the highest quality JPEG photos. I had read a lot in the DP Review forums about raw and jpeg and, for my camera in particular, a lot of people said that the jpegs that came out of the camera were really good, and if you’re crazy and want a lot of extra work, you might be able to sqeeze a little more quality out of the raw format. It kind of made sense to use jpeg – with raw you have to process every single photo you want to print, post online, or do anything with. The other thing is that raw takes so much space on a memory card compared to jpeg.

So for a long time, I only shot with jpeg. I was very pleased with my photos, especially compared to my old point-and-shoot. I sometimes did adjustments to lighten or darken areas of my pictures, or add more saturation here or there. You can only do so much before you start to notice a lot more grain, or loss of detail. Some things you just can’t fix – like blown (completely white) skies.

I’m not sure what prompted me to finally try raw. Maybe I was just feeling adventurous that day. Anyway, I set my camera to raw, and of course it makes no real difference when shooting. When I got home, and transferred the images to my computer, it took a lot longer. When I took my first look at the pictures I was disappointed. They were okay, but not great – my foray into raw didn’t leave me impressed. They all seemed too dark, or too light, and all of them seemed pretty flat. The next morning I looked at the pictures again, and I thought I’d see what I could do with them in Photoshop (I didn’t really know about Adobe Camera Raw at that point). When they opened in ACR I tried fiddling with some of the settings. This is when a whole new world opened before me (okay that’s a little over-dramatic). The range of developing I could do without any loss in quality amazed me. I could get detail out of areas that looked black. I could get blues out of overexposed skies. Raw is no substitute for properly exposing photos of course, but when there is a large difference between the exposures for different parts of the image, raw can help immensely.

So I was impressed, but there’s still the problem of editing any photo you’re interested in in ACR or other software. However, now that I’m using Adobe Lightroom it is very easy. You can batch develop photos you import, and it’s very easy to switch between viewing all your pictures and making a few quick adjustments.

With the right software, raw is definitely the way to go. You get more dynamic range in your photos, and adjustments don’t cause any loss of image quality. Files are significantly larger than jpeg, so you do have to have larger memory cards and hard drives, but the difference in quality of the final image is easily worth any extra hassle.

Cabinet Design

Well, I finally finished the cabinet I’ve been working on for the last while. I’m pretty happy with it, but everything would have been much easier (and much, much quicker) with a shop. The entire thing was built with hand tools on my dining room table.


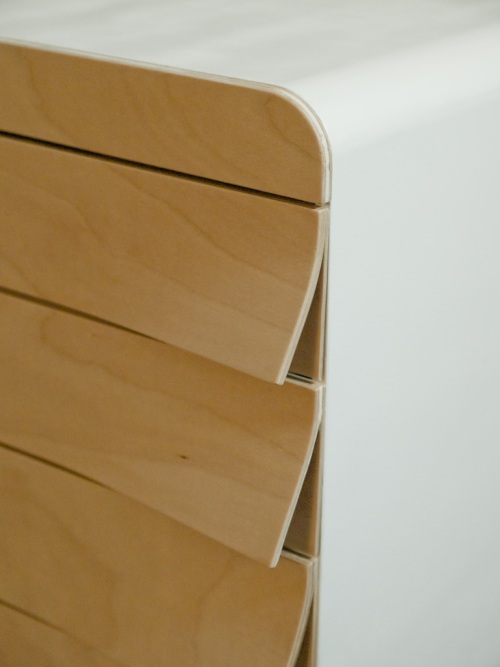
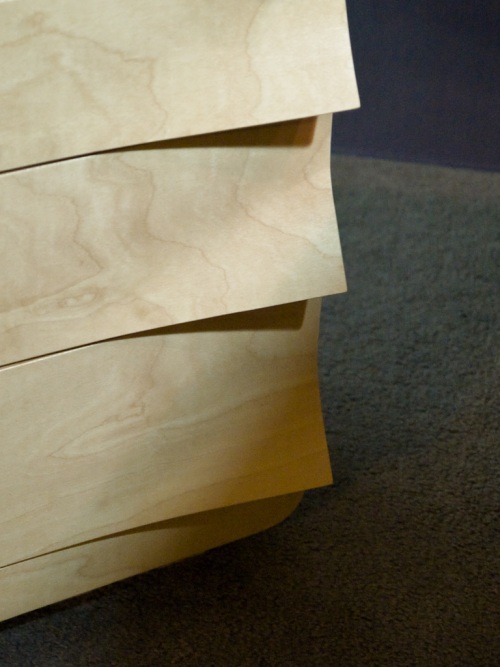
It’s all baltic birch plywood, with full extension drawer slides. The handles are bent into the drawer fronts – the bottom left corner is bent out about an inch. It turns out that this is pretty easy to grab, and doesn’t catch much dust.


The cabinet is designed to fit in a specific space, so the dimensions were set ahead of time. The goal of the design is to be clean and modern, with a natural, organic presentation. The drawer fronts are reminiscent of bark peeling off a tree. Before I put the drawers in, the cabinet looked more futuristic or pod-like than I had envisioned, so I was a little bit worried. After seeing the final product, I think the flatness of the fronts, along with the bent detail balance out the cabinet, and together they create a pretty nice effect.


What to do with all those photos.

I wanted to like Aperture. I really did. I was getting a laptop so I could take it with me on trips to download photos from my camera. I like apple’s products in general, and I was getting excited about Aperture, so I decided on a Macbook Pro. Apparently Aperture doesn’t run very well on plain old macbooks – the graphics card isn’t good enough. So I lay down the extra cash for the pro, take it home, and start setting everything up. I install the Aperture trial, and start importing my pictures … and continue importing my pictures … for hours … for a couple days. Eventually I switched to Lightroom and I got all set up in a day. Below is a bit of a review.

Speed
Lightroom seems to a little faster and simpler than Aperture, and still does almost (give me stacks!) everything that I would want. With Aperture I would often get the dreaded beachball cursor. Now this is a fast computer – a high-end Macbook Pro (2.33Ghz Core 2 Duo with 2GB ram). This should not happen. But with Lightroom, even browsing my whole collection is fairly speedy, and I rarely get the spinning cursor.


Adjustments
For image editing, Lightroom has very detailed non-destructive adjustments, just like Aperture, but it seems to me that images can be improved dramatically much quicker than aperture by just using the “Basic” controls on the right side. (vibrance is a beautiful control – I don’t think Aperture has an equivalent). I was never able to get results I was really happy with in aperture. In lightroom I can usually do all the color adjustment I want with the white balance controls, “Recovery”, “Fill LIght”, “Blacks” and “Vibrance”. Of course there are lots of more detailed controls for more fine-grained control which is occasionally needed. Cropping, straightening, spotting are all simple and intuitive in both programs.

Stacks
The one thing I miss from Aperture is stacks, which groups a bunch of photos, and only shows the best one of a group. Similar results can be achieved with stars and flags in lightroom, but it’s not the same and it takes a bit more work.
Edit:
Somehow I overlooked this in Lightroom. Both programs have stacks. You can either stack automatically by capture time or you can assign stacks manually.

Display
Aperture is also better for dual monitors, with flexible display settings. Lightroom doesn’t work on dual monitors yet, but the fullscreen mode (press f) in Lightroom is really nice, with the pop-out panels.


Organization
Other than all this, the filtering (to see only the photos you are interested in) is very powerful in both programs. The terminology is different between the programs, but the abilities are very similar. I didn’t really like that everything had to be in projects in Aperture. And a project can’t hold more than 10,000 images, so I can’t fit all my photos into one project. Lightroom’s catalog holds all the photos, and then they are arranged and filtered within that. This hierarchical structure makes a little more sense to me. The Folders in Lightroom are just the folders on your harddrive, and if you rename them, you rename the folders. This seems much more intuitive than Aperture’s projects to me, and if I ever switch to another program, everything is still organized by folder the way I want it.

Storage
The catalog system in Lightroom seems to work fairly well. I’ve got everything on an external hard drive, some of my best in a catalog on my laptop hard drive, and I can merge the changes I make on my laptop catalog back to my external catalog pretty easily. Of course, you can ignore all this and only have one catalog – that’s by far the simplest. Changing the catalog you’re browsing requires a restart of Lightroom, which seems a little dumb to me, but I rarely change catalogs, so this doesn’t affect me too much.

Backup
Aperture has built-in backups with its vault system. Lightroom backs up its catalog every week too, but I don’t store any of my photos in the catalog (although you can) – just all the meta-data. I back up my whole filesystem rather than letting the program backup it’s own package of my images, and I’m much more comfortable with this. This seems to take a lot less disk space too.

In the end, if you have a Mac, you should try them both. Both have 30 day demos, which is great for evaluating. Both programs are around $300 CAD, but if you’re a student you should be able to get either one for just over $100. If you’re stuck on windows, Lightroom is your option, but you also have the free option of Picasa which is much simpler and less powerful, but still not too bad.


Sleeping in the Car

Am I naive? This summer I’ve been on lots of excursions to the mountains by myself, and I usually sleep in my car. I find some quiet forested side road or turn off, park the car, lock the doors, fold down the back seat and sleep with my legs sticking into the trunk. It’s quite comfortable, the car is old enough that’s it’s not airtight while still not having large enough rust holes to let the mosquitoes in. Then I can wake up at dawn, and get anywhere I want quickly enough that I can take pictures in the early morning light. It really works out quite nicely. No problems.

So now I’m thinking of going on a road trip to Yellowstone. I haven’t been to the states in ages, so I was reading up about longer road trips. I started reading Road Trip America, which is a really valuable site by the way – especially the forums. So I started reading about people sleeping in cars, which seems quite natural to me. Apparently not so to most people. I had to laugh when I read about the dangers of sleeping in your car. People seem really scared in the states. One place even talked about the possibility of private property owners shooting at you. And this seemed to be justified to them. But then I got to thinking, is it really that dangerous in the states? I can’t believe it’s that much different than here. Are people just more paranoid? Or am I just weird and do most Canadians see things the same way?

So anybody on Road Trip America who thought that it was ok to sleep in a car recommended only sleeping in a well-lit truck stop, and notifying the attendant so that they can keep an eye on you. This just seems backwards to me. Then you’re sleeping in a grungy parking lot, surrounded by traffic, with artificial lights blinding you. I would much rather find a quiet gravel road in the country, where you can watch the stars and fall asleep to the sound of wind in the trees, or crickets chirping. And what danger is there? Are there nefarious criminals patrolling backroads, looking for all the poor saps dumb enough to think they’re safe in their vehicle? And what, would they just shoot me, and then break into my car to get at the trail mix? Or maybe they want my sleeping bag to sell on the black market.

So tell me – is this a real danger or are people paranoid?


Site Upgrade

I just recently changed hosting providers, and with all the messing around with databases and ftp, decided to upgrade wordpress right away. So I am now with Hostgator instead of Powweb, and so far I am pretty impressed. Yesterday, I thought the site had slowed down again (like it always did at Powweb), but then I did a traceroute and found out that it was my ISP that was timing out, not Hostgator. So I have three domains hosted on one account, and they all seem pretty speedy. At Powweb I had to do some .htaccess magic to make multiple domains work, and they never worked quite right. At Hostgator they have a beautiful little tool that does it all for you (with the $9/month package), and it works flawlessly. Of course, I’m sure I’ll have complaints at some point, but right now I’m really impressed. Oh yeah – those three domains are joelkoop.com/updates, where you are now, JoelKoop.com, a photography portfolio site I’m working on, and TravelsAndTrails.com, a very unfinished travel site where a person can look up places they might be interested in going or add places they’ve been to. This one is going to change significantly, so it might be unrecognizable in a couple months.

The control panel at Hostgator is not as flashy, but more powerful and easier to use than Powweb’s. Although “easier to use” doesn’t mean “easy to use”. Someone, at some point in time, needs to do usability testing on these control panels and get a designer to create them.

Taking or Making Photos

I’ve been thinking a lot lately about taking pictures as compared to making pictures. Now I take a lot of pictures – I enjoy taking pictures. In my design classes, there has been a fair amount of photography, and thinking of photography as both a technical process and an art. In design, generally, you are expected to make pictures: to arrange the world into a state that communicates an idea, and then capture that in a photo. Usually when I take photos for my own enjoyment I’m not making pictures, I’m taking them. For me this is a way of experiencing the world around me, not arranging it to my specifications. This is generally how I approach life in general, – I’m an experiencer, not an arranger. This has a significant effect on the images I produce. Sometimes I’m tempted to think that taking pictures is a lesser art form than making them. I’m not sure this is the case though. Either way you’re capturing a subjective view of the world around you, and all the same composition and color theory principles apply. Your pictures say a lot about your life, whether you experience or create, and either approach can communicate a variety of messages. I think that the result of taking pictures is often un-original, and I think that’s due to the fact that we all experience many of the same things, and in general, life can get boring. So maybe taking and making photos are the same, but what with taking photos, you’re manipulating your life rather than a composition of objects or people in front of your lens. So there’s the challenge – create an interesting life for yourself and you can *take* interesting photos.

Adventures / Misadventures

I get up at 5 in the morning, pull out a couple granola bars for breakfast, and organize my daypack for the hike. Sunrise is at 6:11 but at 6 it’s still pretty dark because of the clouds. It looks like it will be an overcast day – not so good for pictures, but at least it won’t be too hot. I drive for a couple minutes to reach the trailhead, lock up the car, and start the hike. Right away I’m climbing, first through poplar, then mixed, and finally alpine spruce forest. It is a very long and grueling climb before any meadows appear – I’m all about the meadows. The first meadow is the valley between Mt. Stearn and ridge I’m heading for. Mt. Stearn is the shorter and easier hike, so of course I’ll be taking the right branch to the ridge. Right away, I’m climbing through more trees, which is a bit of a disappointment. The trail continues to climb, alternating between thick trees and small meadows. I cross rocky creeks, muddy streams, and everything in between. None of my maps have the trail on them, so I assume I’ll be heading up the first slope to the ridge. Nope. The trail follows the ridge all the way to the far end, and then climbs that slope. Finally I leave all the trees behind me! Meadows, scree and amazing views await! (until I get into the cloud of course – the clouds are covering the very top of the ridge) I arrive at a beautiful little lake, surrounded on one side by the mountain, and the other by open meadows.

Then I hear it – rumbling. Is that thunder or a rockslide? It can’t be thunder, these are overcast clouds, not thunder clouds. KABOOM! The flash and sound instantly flatten me. Was that instinct or did the sound knock me over? The lightning hit a couple hundred yards away. I’m currently the highest object in the meadow. KABOOM! Another one. Now it’s starting to rain, and at 7000 feet it’s cold. There is no kind of cover for a long way. So I start to crawl on my hands and knees through a freezing marshy meadow. My hands are white with cold, my pants are totally soaked. At least I have my rain jacket and a couple layers underneath. Lightning is still flashing all around, and the thunder is shaking me. Or is that fear? Or cold? Finally I reach a gully, so I feel fairly safe walking again. Now it starts hailing – pea size now – hopefully it doesn’t get bigger. The gully is getting slippery and slushy with melting hailstones. My mind races ahead to all the places where the trail is exposed. Can I avoid them? Now I’m thankful that there aren’t too many meadows. The storm doesn’t seem to be letting up. I end up making some detours through spruce thickets, thoroughly soaking myself. My brain finally realizes that lightning isn’t the only problem here. I’m really cold. I’ve heard that staying dry is the best way to avoid hypothermia. So much for that. There’s nothing I could start a fire with here either – everything is far too wet. I decide that the best thing is to just keep moving and get down off the mountain as quickly as possible. It’s about 5 hours back to the car, I should be able to do that. I grab some trailmix and speed up, letting my body create its own heat. Eventually the hail stops, and the rain slows a little. The lightning is getting less frequent. I continue to hurry down, and as I do the air starts to get a little warmer. Now I’m just thinking of getting into the car and turning up the heater full blast.

I get to the car and unpack everything – peel apart papers from my wallet (silly me – I forgot to put it in a ziploc bag), dump out my camera bag (there was half an inch of water in the bottom), and wring out my socks. And I shakily write down a few notes about my hike. Oh yeah, the ridge I was heading to? – Lightning Ridge.

Some notes:
– Lightning is often avoidable, it’s not smart to hike in storms – but the forecast was for 30% chance of rain
– Lightning only kills about 20% of the time – but it causes various levels of disabilities over 70% of the time, and alone on a mountain that would often kill.